Growing potatoes at home can be a rewarding and cost-effective way to ensure you always have this versatile staple on hand. Potatoes are relatively easy to grow, even for beginners, and with the right techniques, you can enjoy a bountiful harvest. Here are six in-depth tips to help you successfully grow potatoes and maximize your yield.
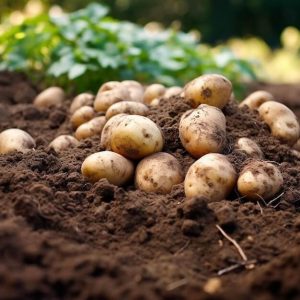
1. Choose the Right Varieties
The first step to a successful potato harvest is selecting the best variety for your region and needs. Potatoes come in many types, each suited to different climates and culinary uses.
- Russet potatoes are perfect for baking and frying, known for their fluffy texture.
- Yukon Gold offers a creamy flavor, ideal for mashing and roasting.
- Fingerling varieties provide a unique look and are excellent for gourmet dishes.
When choosing a variety, consider your region’s climate and growing season. For shorter seasons, opt for early-maturing varieties. Consult with local nurseries or agricultural extensions for guidance on disease-resistant and high-yielding options.
2. Prepare the Soil
Potatoes thrive in loose, well-drained soil rich in organic matter. Preparing the soil properly ensures the tubers can grow freely without compacted soil hindering their development.
Steps to Prepare the Soil:
- Test Soil pH: Potatoes prefer slightly acidic soil with a pH of 5.0 to 6.5. Adjust the pH with sulfur if it’s too alkaline or lime if it’s too acidic.
- Enrich the Soil: Incorporate plenty of compost or aged manure to provide nutrients and improve drainage.
- Break Up the Soil: Till the soil to a depth of at least 12 inches to allow tubers to expand freely. Remove any stones or debris that may obstruct growth.
For gardeners with limited space, potatoes also grow well in containers or grow bags with nutrient-rich potting soil.
3. Plant Seed the Right Way
Using high-quality seed potatoes is essential for reducing the risk of disease and ensuring a productive harvest. Avoid planting grocery store potatoes as they are often treated with chemicals to inhibit sprouting.
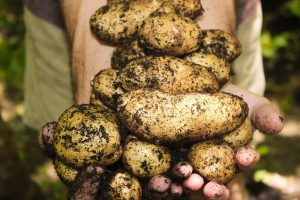
How to Prepare and Plant Seed Potatoes:
- Cutting Seed Potatoes: If using large seed potatoes, cut them into pieces, each with 1-2 “eyes” or buds. Allow the cut pieces to cure for 1-2 days in a cool, dry place to prevent rot.
- Planting Depth and Spacing: Dig trenches about 4 inches deep and plant seed potatoes 12 inches apart. Space rows at least 30 inches apart to allow room for hilling and airflow.
For best results, plant potatoes in early spring after the last frost date when the soil temperature reaches 45°F (7°C) or higher.
4. Water Regularly and Wisely
Consistent watering is crucial for healthy potato plants and proper tuber formation. However, overwatering can lead to diseases like rot and fungal infections.
- Frequency: Provide 1-2 inches of water per week, depending on weather conditions. Increase watering during hot, dry periods and tuber formation.
- Best Time to Water: Water in the morning to allow the foliage to dry before evening, reducing the risk of fungal diseases.
- Use Mulch: Apply a layer of straw or organic mulch to retain soil moisture, regulate temperature, and reduce weeds.
5. Hill the Plants for Maximum Tubers
Hilling is a crucial step in potato cultivation that involves mounding soil around the base of the plants. This technique prevents the developing tubers from being exposed to sunlight, which can cause them to turn green and become inedible.
- Begin hilling when the plants are 6-8 inches tall.
- Use a hoe or shovel to mound soil around the base of the plants, leaving the top few inches of foliage exposed.
- Repeat the process every few weeks as the plants grow taller.
Hilling also supports the plant and increases space for tubers to grow.
6. Protect Plants from Pests and Diseases
Potatoes are susceptible to various pests and diseases, but with proper monitoring and care, you can keep them at bay.
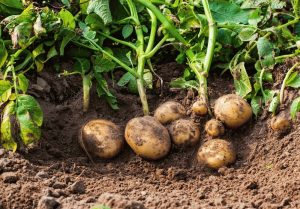
Common Potato Pests:
- Colorado Potato Beetle: Handpick these pests and their larvae from plants. Use neem oil or introduce natural predators like ladybugs.
- Aphids: These sap-sucking insects can weaken plants. Wash them off with water or use insecticidal soap.
- Wireworms: Rotate crops annually to disrupt their life cycle.
Disease Prevention:
- Rotate crops each year to prevent soil-borne diseases like potato blight.
- Avoid overhead watering to reduce the risk of fungal infections.
- Remove and destroy any infected plants immediately to prevent the spread of disease.
Harvesting and Storing Your Potatoes
Harvesting and storing potatoes properly is a critical step to ensure you enjoy the fruits of your labor. When done at the right time and with the proper techniques, you can maximize both the quality and longevity of your potato harvest.
Timing your harvest depends on the type of potatoes you’re growing and how you intend to use them. There are two main harvesting stages to consider:
- Early Harvests for “New” Potatoes: New potatoes are small, tender, and have thin skins. These are typically harvested 2-3 weeks after your potato plants begin flowering. To check if they’re ready, gently dig around the base of the plant and feel for small tubers. Harvesting at this stage provides fresh, flavorful potatoes that are perfect for salads and steaming.
- Main Harvest for Mature Potatoes: For fully grown potatoes, wait until the plant’s foliage turns yellow, wilts, and dies back. This signals that the tubers have reached full maturity. Be patient and ensure the plants have fully dried out to allow the skins to develop a tougher, protective layer. Use a garden fork or spade to carefully dig around the base of the plant, loosening the soil to avoid puncturing or damaging the tubers.
Proper storage is essential to keep your potatoes fresh and edible for months. Once harvested, follow these steps to prepare and store them:
- Curing the Potatoes:
After digging up your potatoes, let them cure for 1-2 weeks in a cool, dark place with good ventilation. Curing helps toughen the skins, reducing the chances of bruising and rot during storage. Maintain a temperature of around 50-60°F (10-15°C) and avoid washing the potatoes during this process, as the dirt on their surface provides a natural protective layer. - Choosing the Right Storage Conditions:
Once cured, store your potatoes in a dark, well-ventilated area with a temperature of 40-50°F (4-10°C). Ideal storage options include a root cellar, basement, or a cool pantry. Ensure the space is dry to prevent moisture from encouraging mold or rot. Avoid storing potatoes in the refrigerator, as the cold temperatures can convert their starches into sugars, affecting their taste and texture. - Additional Storage Tips:
Keep your potatoes away from onions or apples, as these emit ethylene gas, which can cause sprouting.
Periodically check your stored potatoes for any signs of rot or sprouting and remove affected ones immediately to prevent the spread.


Leave A Comment