Kale is a versatile and nutrient-rich leafy green that thrives in container gardens, making it an excellent choice for small spaces like balconies, patios, or even indoors. Growing kale in gallon containers is simple, efficient, and yields a healthy harvest. Follow this guide to successfully cultivate kale at home.
Choosing the Right Container
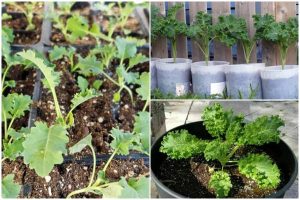
Selecting the appropriate container is a crucial first step in successfully growing kale in a home garden. Kale thrives when its roots have enough space to spread and grow, making a gallon container an excellent choice due to its ideal size and depth. Properly preparing and selecting the container ensures your plants stay healthy and productive throughout the growing season.
To start, ensure your container has good drainage. Poor drainage can lead to waterlogging, which suffocates roots and encourages diseases like root rot. If your chosen container doesn’t have pre-drilled holes, add several at the bottom to allow excess water to escape.
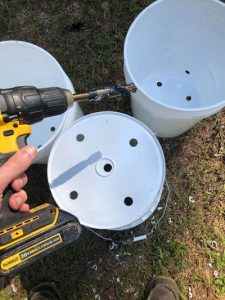
Next, consider the material of the container. Durable options like plastic, ceramic, or terracotta work well. Each material has unique benefits—plastic is lightweight and retains moisture effectively, terracotta is breathable and enhances airflow to the roots, and ceramic adds an aesthetic touch for decorative gardening setups. Choose a material that suits your environment and preferences.
Finally, ensure the container has an adequate size to support kale’s growth. The dimensions should be at least 12 inches deep and wide, giving the roots ample space to develop and anchor the plant securely. Larger containers also help maintain consistent soil moisture and temperature, critical factors for kale’s health.
Preparing the Soil
The foundation of healthy kale plants lies in the quality of the soil. Kale grows best in nutrient-rich, well-draining soil that promotes root development and prevents waterlogging. Preparing the right soil mix is essential for successful container gardening, especially when using gallon containers.
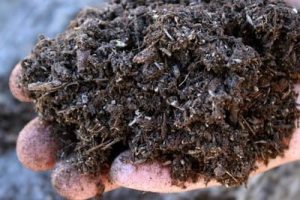
Start by creating a balanced soil blend that supports aeration and retains essential nutrients. Combine high-quality potting soil with compost to provide organic matter and nutrients. Adding perlite or vermiculite to the mix improves drainage and ensures that the roots receive adequate oxygen, which is crucial for growth.
To optimize the soil for kale, ensure that the pH level is slightly acidic, ideally between 6.0 and 7.0. You can test the pH using a soil testing kit and make adjustments if necessary by adding agricultural lime to raise the pH or sulfur to lower it.
Before planting, enrich the soil with a slow-release fertilizer. This provides a steady supply of nutrients over time, giving the kale a strong start and supporting healthy growth throughout the season. Choose a balanced fertilizer that includes nitrogen for leafy growth, as well as phosphorus and potassium for root and overall plant health.
Planting
- Choose the right kale variety: Curly kale, Lacinato kale (Dinosaur kale), and Red Russian kale are great options for container gardening.
- Plant seeds or transplants:
- If using seeds, sow them 1/4 inch deep and space them 6–8 inches apart.
- For transplants, gently place them in the soil, ensuring the root ball is covered.
- Water thoroughly: After planting, water the soil until it is evenly moist.
Providing Optimal Growing Conditions
To grow healthy kale, ensure the following conditions:
- Sunlight: Kale requires 6–8 hours of sunlight daily. If growing indoors, use a grow light for sufficient light exposure.
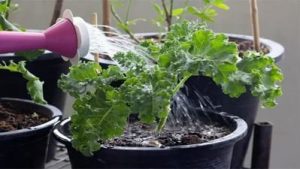
- Watering: Keep the soil consistently moist but not waterlogged. Water the plants every 2–3 days or as needed.
- Temperature: Kale grows best in cooler temperatures, between 45°F and 75°F. Protect it from extreme heat by moving the container to a shaded area.
Fertilizing
Proper fertilization is essential for growing healthy, nutrient-packed kale in containers. To ensure your plants thrive, feed them every 3–4 weeks with a balanced liquid fertilizer. Look for fertilizers with an equal ratio of nitrogen, phosphorus, and potassium, as these nutrients support leaf development, root strength, and overall plant health.
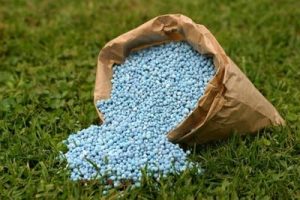
For gardeners seeking an organic approach, compost tea or fish emulsion is an excellent alternative. These natural fertilizers provide essential nutrients and improve soil health while being environmentally friendly. Simply dilute as directed and apply to the soil during your regular watering routine.
It’s important to avoid over-fertilizing, as this can result in overly bitter leaves and may even stress the plant. Always follow the recommended dosage on your chosen fertilizer, and monitor your kale for signs of overfeeding, such as dark, overly lush foliage or slowed growth.
Pests and Diseases
While kale is relatively hardy, it can be affected by pests and diseases. Here’s how to manage common issues:
- Aphids and caterpillars: Use neem oil or insecticidal soap to deter them.
- Powdery mildew: Improve air circulation by spacing plants properly and avoiding overhead watering.
- Slugs and snails: Handpick them or use organic barriers like crushed eggshells around the plant.
Harvesting
Kale can be harvested as soon as the leaves reach 4–6 inches long.
- Pick the outer leaves first: This encourages new growth from the center.
- Use scissors or a knife: Cut the leaves cleanly to avoid damaging the plant.
- Harvest regularly: Frequent harvesting keeps the plant productive.
Here are Other Tips for Success
- Rotate the container occasionally to ensure even sunlight.
- Mulch the soil to retain moisture and regulate temperature.
- Grow companion plants like garlic or marigolds nearby to repel pests.